Q: How do I crop my PDF document to make a smaller visible area with PDF Studio?
A: You can use the “Crop Pages” feature in PDF Studio to crop pages in a PDF. This feature allows you to crop an existing PDF document to set the visible area to any size you want within the current document.
To crop a PDF in PDF Studio, please follow steps below:
- Open the document that you wish to crop
- Select the Crop tool
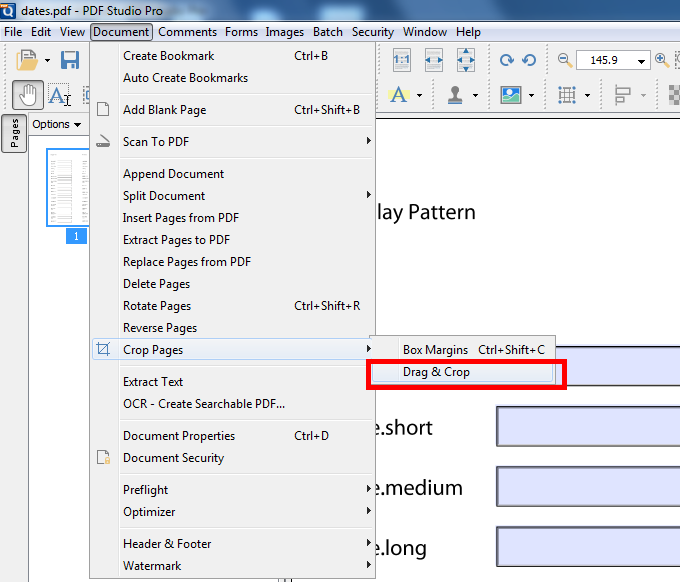
- To crop using the Drag & Crop selection tool, either select icon on toolbar or go to Menu -> Document -> Crop Pages -> Drag & Crop on the menu bar.
- To manually set the crop margins go to Menu -> Document -> Crop Pages -> Box Margins and skip step 3.
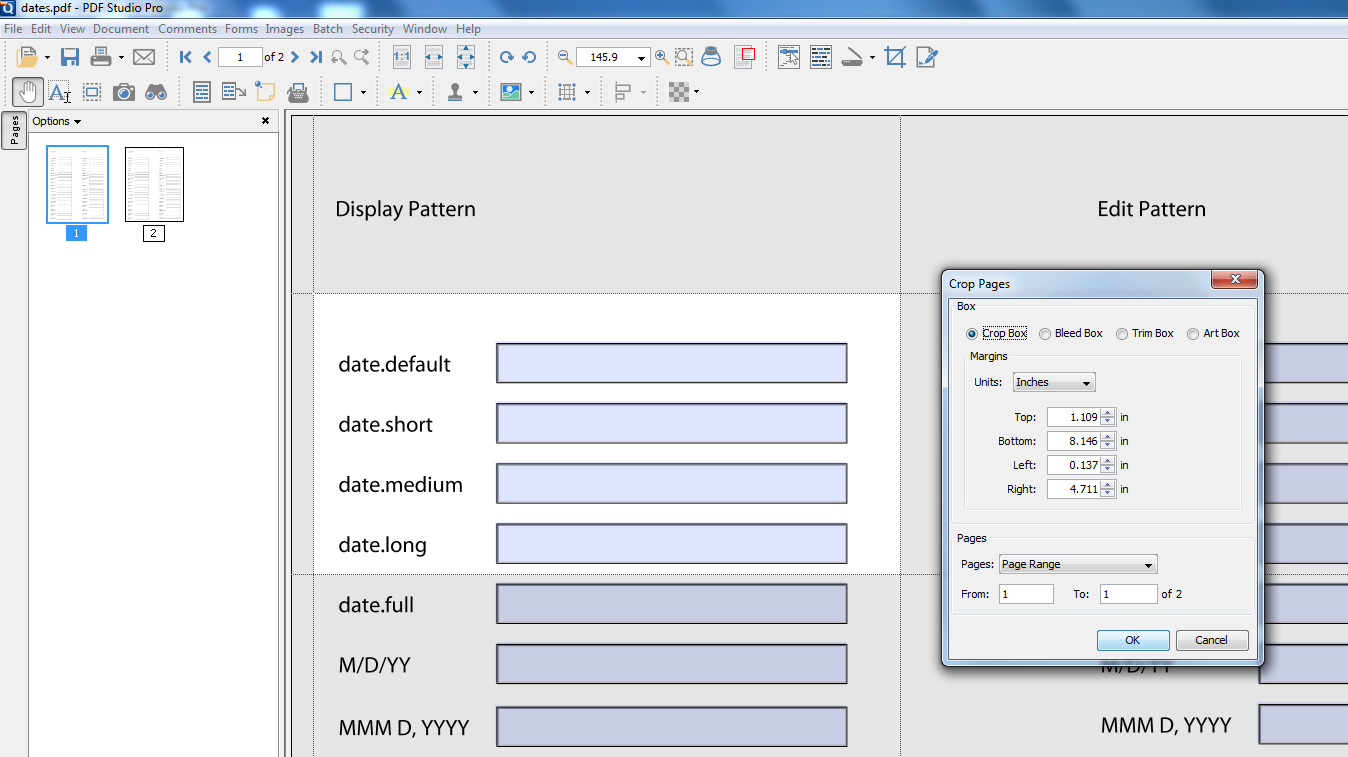
- Using the crop tool, click and drag the cursor to set the visible area that you would like to crop to in the document. After selecting the visible area in the PDF, the Crop Pages dialog will be displayed.
- In this dialog you can manually set the margins by typing values into the Top, Bottom, Left, Right fields. You can also set the page number of pages you want to crop in the document.
- *Note: The page the areas that will be cropped will be shaded in GREY and the area that is not shaded will remain after cropping the PDF document.
- *Note: The page the areas that will be cropped will be shaded in GREY and the area that is not shaded will remain after cropping the PDF document.
- Click OK and apply the changes.
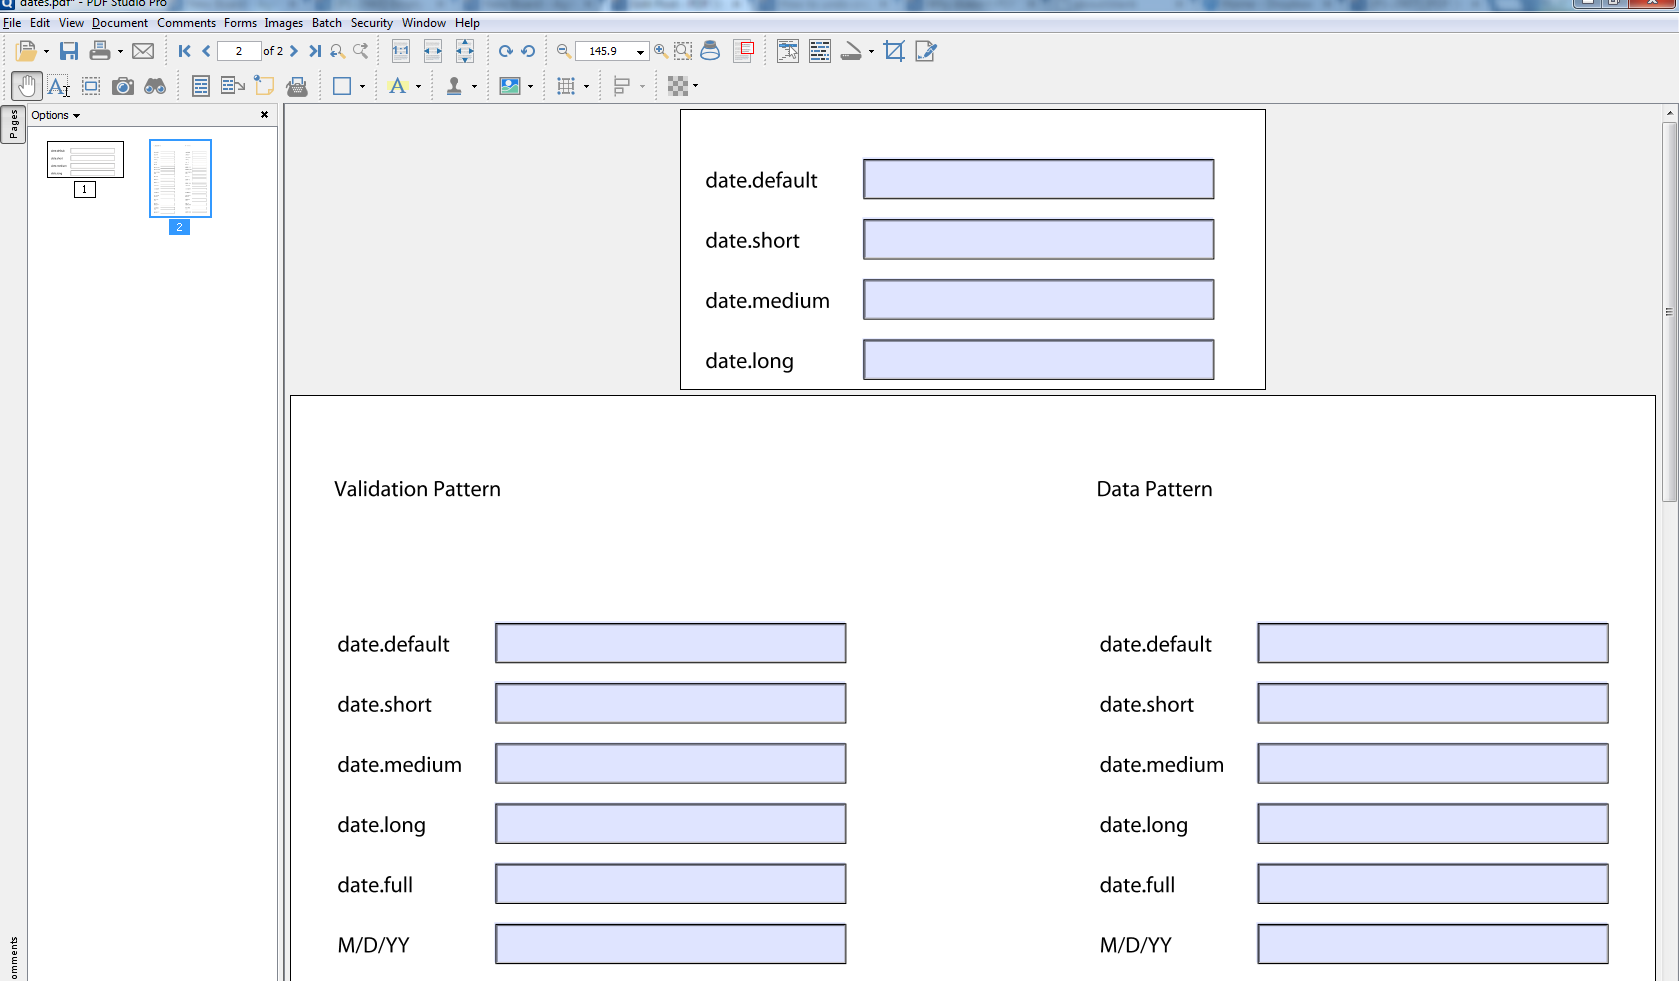
- Make sure to save your document.
Note: Cropping a PDF does not remove any content from the document. It only set’s the visible area within the document. You can always undo cropping by following steps in this article: How to undo cropping and restore original document
If you wish to remove (or redact) content from the PDF entirely make sure to use the Redact feature instead: How to Properly Redact a PDF
