Q: How can I create CAD / Engineering symbols to add to blueprint or design PDFs?
A: Using the Rubber Stamp tool you can create stamps for each symbol you need to use. Once you have created the stamps you can use the Rubber Stamps Manager organize them into folders and use them repeatedly to mark your blueprints or designs. Below is an example of how to create some engineering symbols to be used in PDF Studio.
Creating Custom Symbols for CAD / Engineering
You can create your symbols using either an Image, PDF, or Custom rubber stamp.
Image Stamp Tool
Use this if you already have existing images of the symbols
- Select Comments > Rubber Stamps > Create Text Stamp from the menu
- Select your symbol image to use as the stamp
- Enter any additional options for the new stamp
- Once complete click on OK to save the new stamp
PDF Stamp Tool
You can use PDF Studio to create a PDF with the symbols. If you already have a PDF version of each symbol skip to step #5
- Open PDF Studio and got to Document -> Rearrange Pages ->Add Blank Page
- Choose the “Custom” page size and create the size (i.e. 1 in x 1 in)
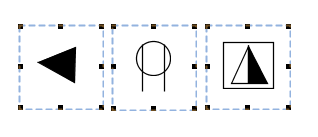
- Using the annotation shape tools create the symbol that you need
- Save the document
- Select Comments > Rubber Stamps > Create PDF Stamp from the menu
- Select the PDF file containing the symbol you wish to use
- Enter the options for the new stamp
- Once complete click on OK to save the new stamp
Custom Stamp Tool
- Select Comments > Rubber Stamps > Create Custom Stamp from the menu
- Enter the options for the new stamp
- Use the tools above and to the right of the preview panel to create your custom stamp
- Once complete click on OK to save the new stamp
Applying Symbol Stamps to the Page
Once you have created your stamps you can use one of 3 ways to easily apply the stamps to the page.
- Select Comments > Rubber Stamp from the menu, and select the stamp you wish to use. Then click the document where you would like to apply the stamp.
- From the toolbar, click on the down arrow
 on the Rubber Stamp
  button, and select the stamp that you wish to use. Then click the document where you would like to apply the stamp.
 - Click directly on the Rubber Stamp button on the toolbar, and then click the document where you would like to apply the stamp.
- This method will change the pointer to the most recently used stamp, or the default stamp if one has been selected. Hovering the mouse over the Stamps button will display a tooltip with the name of the stamp currently saved. If no stamp has been used, and no stamp is set as a default stamp, the tooltip will say “RubberStamp,” and clicking on the button will display the drop down menu of stamps. A stamp can be set to default by editing the stamp from the Manage Stamps dialog, and selecting the ‘Save as default’ check box on the edit stamp dialog.
