Q: Is it possible to sign a PDF document using PDF Studio?
A: Yes, PDF Studio offers multiple ways to sign PDF documents.
Apply an Official Digital Signature (Pro Only) – This method is the most secure and accepted form of signature. It requires a pass worded digital certificate to be created prior to being placed on the document. Once placed on the document the document can no longer be edited in any way or the signature becomes invalid. Below are the descriptions of each option as well as how to create each signature.
Adding a Digital Signature
- Open the document that you wish to sign
- If the document already has a digital signature field just click on the field to begin the signing process. ( Skip to Step 6)
- If the document does not have a digital signature field you will need to click on either Security->Sign Document or the sign document button located on the toolbar

- Draw the signature box where you would like the digital signature to be placed
- Your first time signing a document you will be asked to either import an existing ID or create a new one. Follow the on screen instructions to complete the process.
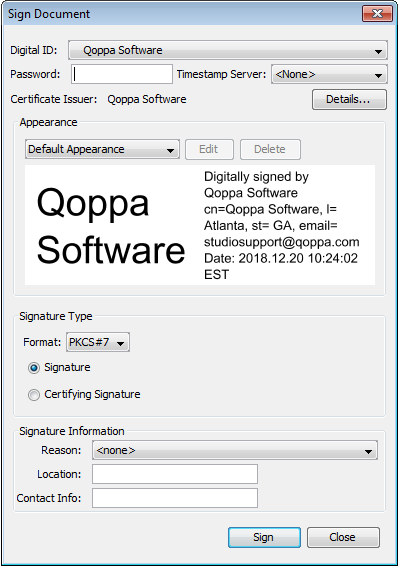
- Once you have either imported or created a new signature you will be taken to the signing screen where you will enter your password and then click sign
- It will ask you where to save the signed document and then your document is now signed.
Draw a Signature with the Pencil Annotation – You can hand-draw your signature using the drawing annotation tool. This will allow you to use your mouse (or touch screen) to draw your signature as you would with a pen. NOTE: This signature can still be removed or edited once placed.
Drawing a Signature
- Open the document that you wish to sign
- Click on the Pencil tool

- Draw your signature on the document using your mouse or touch screen just as you would on paper
- Save the document and now you have signed the document.
Import your Scanned Signature as an Image Stamp – You can use either the Image Import function or Stamp tool to place a scanned image of your signature directly on the document. For this it is best if you have a PNG file with a transparent background of your signature. NOTE: This signature can still be removed or edited once placed.
Importing Signature Image
- Open the document that you wish to sign
- Click on the arrow icon next to the Image tool and then click on Image

- Browse to the file on your computer and click on open
- Place the signature where you need it on the document. You can resize the signature to make it fit where you need.
- Save the document and your document is ready to be sent.
Creating Signature Stamp
- Open the document that you wish to sign
- Click on the arrow icon next to the Image tool and then click on Create Image Stamp
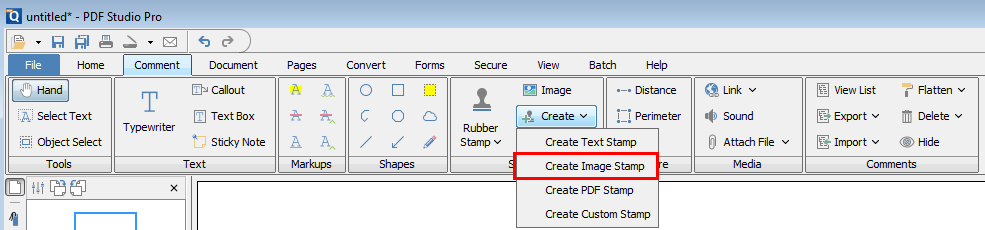
- In the following window set the options for the stamp.
- Name: The stamp name for future use
- File: Locate the file to be used on your computer
- Scale: Size of the stamp
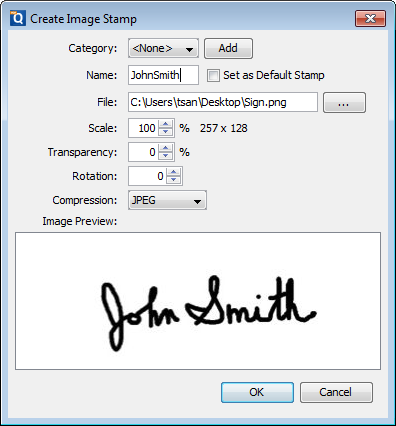
- Once complete click on OK and the stamp will be listed as one of the available stamps for you to use on your document
- Place the signature where you need it on the document. You can resize the signature to make it fit where you need.
- Save the document and your document is ready to be sent.
